Thank-you page selection and conditional logic
🎯 General principle
Blastform lets you customize the end-of-form experience based on your users' answers.
Thanks to conditional logic, you can choose which thank-you page or intermediate page will be displayed, and decide whether your conversion pixels should fire or not.
🟩 A) Top section – Configuring the "Thank You Page"
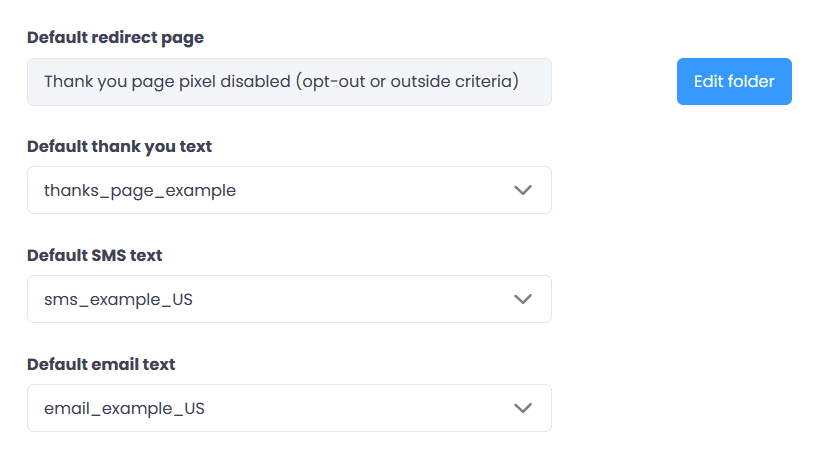
🔸 1) Default page: "Thank-you page pixel disabled"
By default, the selected page is "thank-you page pixel disabled".
This means that if no no conditional logic is configured, this page will be displayed automatically at the end of the form.
👉 No pixel will be triggered on this page.
💡 Recommended use:
If certain leads don't interest you (off-target or invalid), this page is ideal for excluding them from tracking.
📄 Behavior :
No active logic → "Thank-you pixel disabled" page → ❌ No pixel triggered
🔸 2) Choosing the default thank-you text
You can select the thank-you text to display for all leads, whatever their answer.
This message will be displayed on the thank-you page if no specific logic applies.
🔸 3) Choice of SMS content / Confirmation email
You can also customize the SMS and/or email content that the lead will receive after submission.
This lets you adapt the message to your overall scenario (registration confirmation, reminder, additional information, etc.).
🖼️ Example screenshot: "Thank You Page" interface with choice of text, SMS and email
🟦 B) "Redirection and conditional logic" section
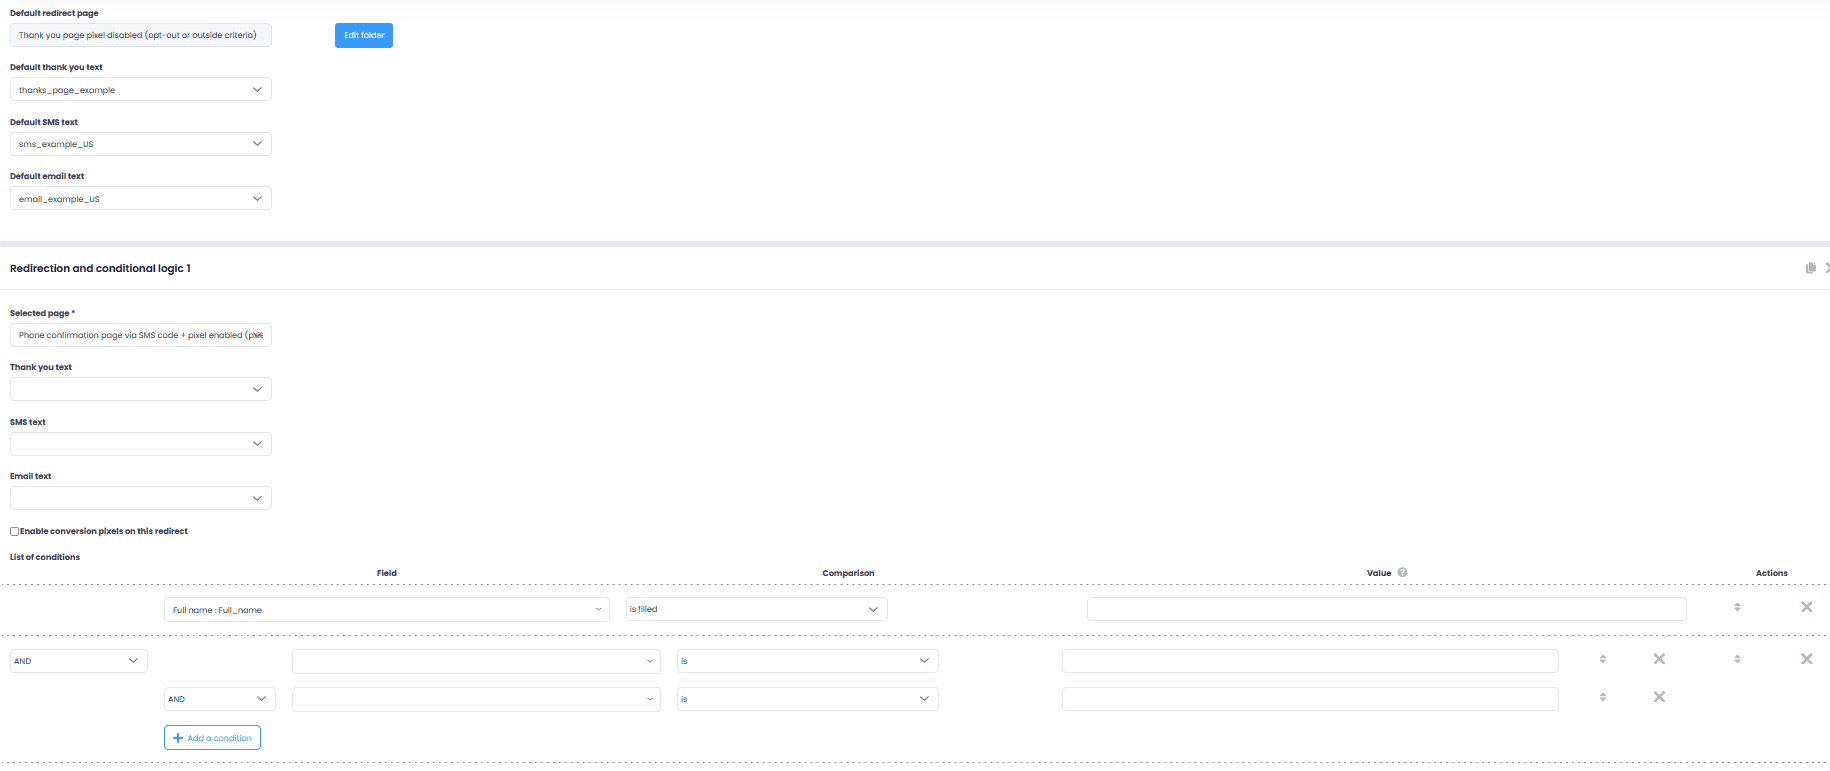
This section lets you create dynamic redirect rules based on the visitor's answers.
Logic rules are processed in display order : the logic 1 will run before the logic 2, and so on.
🔹 1) Select the page to display
In each logic rule, you can choose the thank-you page or intermediate page to display when the conditions are met.
(e.g. show a phone validation page for mobile leads).
🔹 2) Choice of associated thank-you text
You can also set a specific thank-you text to display for this logic, different from the default text.
💡 Example: show a personalized message for qualified leads or an informational message for off-target leads.
🔹 3) Personalization of the SMS / email sent
Each logic rule can trigger different SMS and email content, depending on the conditions defined.
This lets you send more relevant messages tailored to the lead's profile.
🔹 4) Activation or deactivation of pixels
You can tick the box "Enable conversion pixels on this redirect".
-
✅ If the box is checked, pixels will be triggered on the selected page.
-
❌ If unchecked, no pixel will be sent for this logic.
💡 This helps prevent multiple or unwanted conversions.
🔹 5) Definition of trigger conditions
This is where you define the rules that activate each logic.
You can combine several conditions based on the form fields.
📘 Example :
-
Trigger the logic if the phone number starts with 06 or 07 (mobile)
-
AND if the person answered that they like sports
➡️ In this case, the visitor will be redirected to the phone confirmation by SMS codepage, with pixels enabled.
🖼️ Example screenshot: conditional logic interface with multiple conditions and associated redirect
🚀 Final step — Publishing
Don't forget to click the button "Publish" at the top right of the page to save and activate your changes.
No change will be applied without this action.
🧭 Quick checklist
✅ Default thank-you page configured
✅ Conditional logic created in the right order
✅ Precise and consistent conditions
✅ Pixels enabled or disabled as needed
✅ Published after the changes